Docs
Creating a virtual environment in the jasmin notebooks service
Creating a virtual environment in the notebooks service
Creating a virtual environment is useful to allow a discrete set of extra packages to be installed to meet specific requirements. This allows a user to run multiple environments with different dependencies without conflicts.
There are a number of ways to create a virtual environment to use with the notebook service. This document outlines the most common and reccomended methods, and then some other ways which you might find useful.
Please note that environments created for the notebook service will not work on the jasmin scientific analysis servers or the LOTUS batch processing.
Step 1: Creating a virtual environment
This step creates a python virtual environment, and allows you to install packages into it.
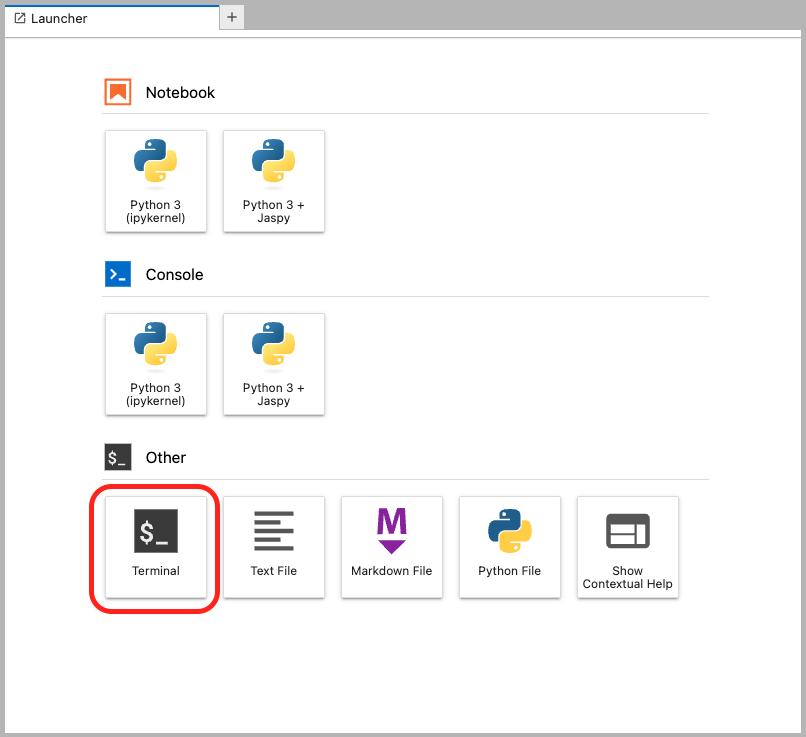
To get started, head to https://notebooks.jasmin.ac.uk and click the terminal button.

Then, type these commands at the bash shell which appears.
First, make a directory in which to store your virtual environments. You can put this wherever you like, as long as you reference the same place later. You could store several virtual environments within this directory, for different purposes. Then, change into that directory.
mkdir ~/nb_envs
cd ~/nb_envs
Next, create a new empty virtual environment. We recommended including the
--system-site-packages argument which will allow you to add packages on top
of jaspy, rather than starting completely from scratch.
python -m venv name-of-environment --system-site-packagesThen, activate the specific virtual environment created above, which will allow you to install packages.
source name-of-environment/bin/activateIf you want to be able to use your virtual environment as a jupyter notebook
kernel (reccomended), you should install ipykernel using pip.
pip install ipykernelYou can then install whatever packages you need in the environment.
pip install pyjokesIf you change your mind and need to add more packages in the future, it is simple to activate the virtual environment in the same way as above and use pip to install more packages.
Step 2: Making the notebook service recognise your new kernel.
These steps are also run from the notebooks’ service shell, as above.
If you aren’t still there from the last step, cd to the location of your venv.
cd ~/nb_envsIf it isn’t already active, activate the virtual environment.
source name-of-environment/bin/activateRunning the following command will make the notebook’s service notice your new virtual environment, and include it in the list of kernels which you can run code with. You only have to do this once.
python -m ipykernel install --user --name=name-of-environmentStep3: Using Your New Kernel

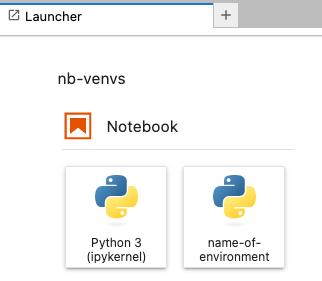
You can then choose this kernel from the jupyterhub homepage, or from the top right of any open notebook. No changes to the python code within are required.

Other tips & useful knowledge
Activating an environment without it being a kernel.
If you follow Step 1 above to create a virtual environment, it is possible to
use the packages from this environment in a python file without making it a
kernel. While this can be useful, it has the very distinct disadvantage of
hardcoding the path to your virtual environment in your python code. For this
reason we discourage using this method with a medium level of severity. To do
this, simply add the following code to your python file before any
imports. Adjust the venv_path variable to be correct for the venv you
created.
import sys
import pathlib
import platform

venv_path = "~/nb_envs/name-of-environment"

py_version = platform.python_version_tuple()
sys.path.append(
    str(
        pathlib.Path(
            f"{venv_path}/lib/python{py_version[0]}.{py_version[1]}/site-packages/"
        ).expanduser()
    )
)
Explanation: this adds the site-packages folder from your venv directly to the
path python uses to search for packages ($PYTHONPATH). This lets python
find them to import.
Can I install packages from inside my python code?
We very strongly recomend NOT trying to install python packages from
inside notebook code. pip isn’t designed for it, and it is almost always
easier to activate the venv as above and install things that way.
If you wish to record the set of packages inside your venv so you can install them en-masse later, pip has the facility to do this. To export a list of packages that exist inside a venv, from the notebooks bash shell with the virtual environment in question activated:
pip freeze > requirements.txtTo install a list of packages which have been exported:
pip install -r requirements.txtExporting packages in this way is also useful for sharing your environment with others, reinstalling when it breaks etc. It’s a good idea to keep the requirements file alongside the code in version control. If your code becomes more complex it is probably more sensible to make it a python package, and install it as one, but doing that is outside the scope of this document.
If you really must, you can call pip from inside your notebook like this: (after first updating the packages variable to be the ones you want to install.)
import sys
import subprocess as sp

packages = ['pyjokes']

sp.check_call([sys.executable, '-m', 'pip', 'install'] + packages)
Can I use conda instead of a virtual environment?
Yes, no problem.
To create a conda environment, sinply run the following at the JASMIN Notebooks shell:
conda create --name name-insert-here ipykernelInstall any packages you which to use in the environment:
conda install --name name-insert-here pyjokesMake the notebook service recognise your environment as a kernel:
conda run --name name-insert-here python -m ipykernel install --user --name name-insert-hereCan I get rid of my old kernels from the notebook service?
Yes.
To list the names of kernels you have installed, run the following at the JASMIN notebook’s shell:
jupyter kernelspec listTo remove one of them, run:
jupyter kernelspec uninstall insert-name-here