Docs
Provisioning a Sci VM in a Managed Cloud Tenancy
Provisioning a Sci VM in a Managed Cloud Tenancy
This article is for admins and managers of managed-cloud tenancies and shows how to provision a sci VM within one. It involves the following:
- Becoming a member of a managed cloud tenancy
- Provisioning a VM
A “sci vm” is essentially the same as the general-access scientific analysis servers, but created within a specific tenancy aimed at a certain group of users. The manager/deputy then has the responsibility to stop/start/restart or redeploy the VM, and to control who can access it.
The managed cloud tenancy has four access roles:
MANAGERrole: can approveDEPUTY,ADMIN, andUSERrole access requestsDEPUTYmanager role: can approveADMINandUSERrole access requestsADMINrole: can access the cloud portal and can restart or provision the Sci VMUSERrole: can log in into the sci VM from a JASMIN login node
Apply for access to the Sci tenancy
A managed cloud tenancy is accessible via the JASMIN cloud portal . Access is controlled by a service corresponding to the name of the tenancy: these services are listed under Sci Analysis VMs category of “My Services”.
Access the tenancy
With an ADMIN role, you can log in to the JASMIN cloud portal using the same credentials for signing into the JASMIN accounts portal.
You will be presented with the “Dashboard” page -below- showing the tenancies you have access to. On the dashboard, select the organization representing the tenancy to find out the VM provisioned within a given tenancy, e.g ncas-sci-M
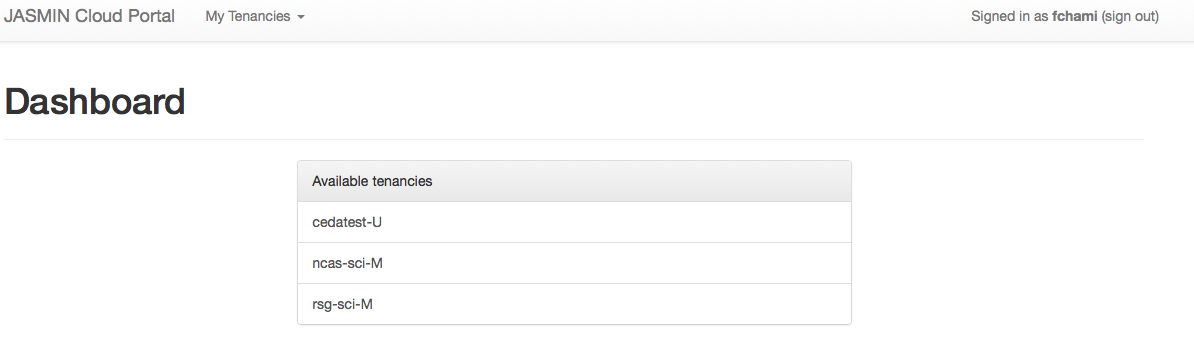
Note: The “ncas-sci-M” tenancy shown below has 0 machines as this is a new tenancy. We will proceed next to the provisioning of a virtual machine.
Provision a virtual machine
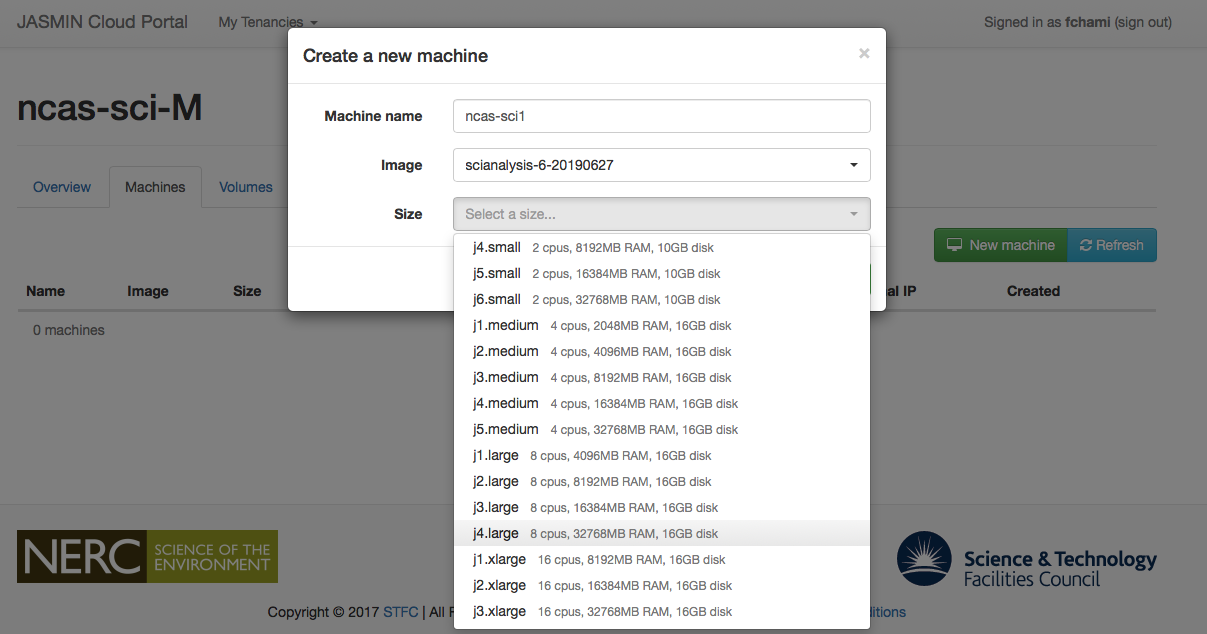
Step 1: Select “Machines” from the top menu, then click “New machine” to create a new VM. Choose a name for the new VM. Then select a size from the drop-down menu which shows the catalog of VM template size. For example, select “j4.large” which allocates 8 CPUs and 32GB of RAM resources for the new VM
IMPORTANT: A Sci machine should be deployed with a minimum of 2 GB RAM
IMPORTANT : A Sci machine name should not exceed 8 characters long. The
preferred naming format is sci
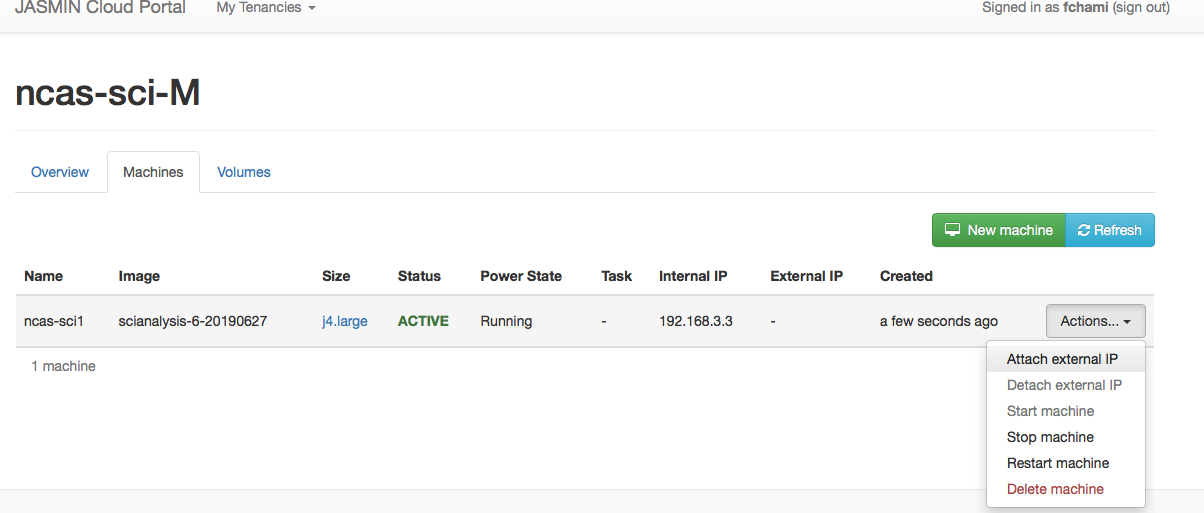
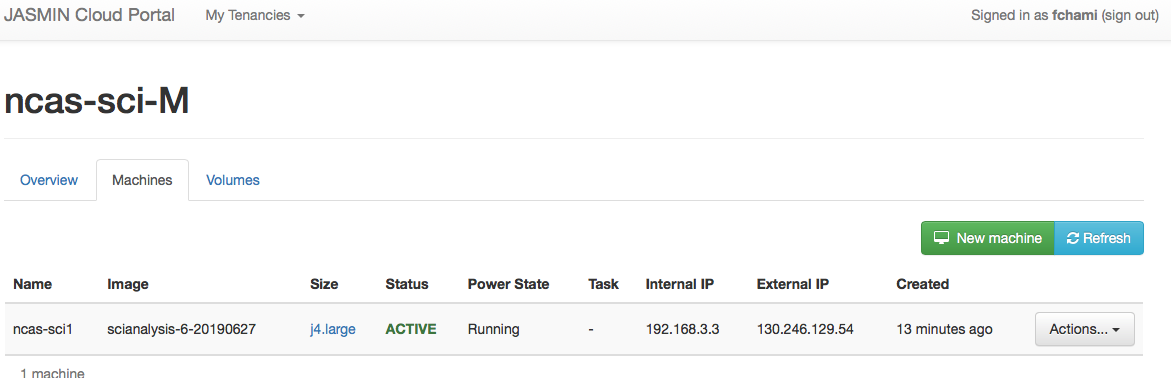
The VM with the chosen name ncas-sci1 is created and it is running as shown below.

Step 2: Attach an external IP to the new VM by clicking “Actions” and selecting “Attach external IP”. Note that you can restart the VM from the “Actions” menu.
Step 3: From the box that pops up -see image below- click on the “+” (green button) to add an IP. Then click on the down arrow next to “Select an external IP” you will see the IP address to assign to the machine, select the IP and click attach IP
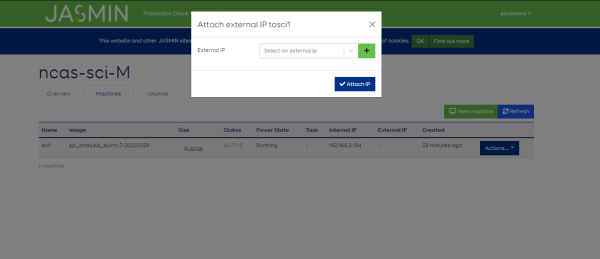
Step 4: Click “Attach IP”
Important note: As ADMIN and MANAGER of a Sci tenancy, you should note the
“External IP” as this is the IP address you will need to provide to your users
in order for them to connect to the machine via SSH using a JASMIN login
server.
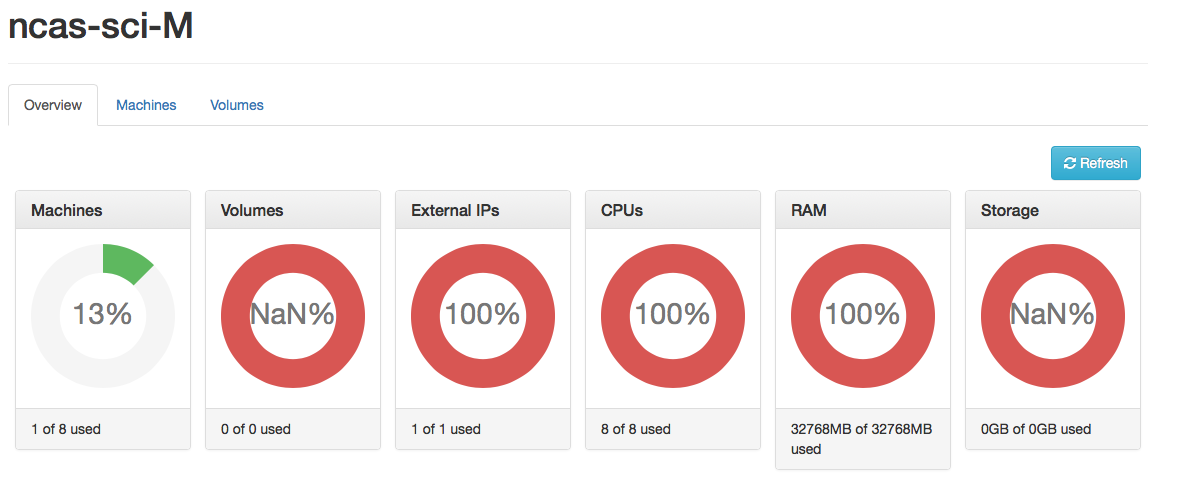
Step 5: An overview of the resources used by the VM is shown below
Note 1: Only ADMIN and MANAGER roles have access to the JASMIN cloud portal and can provision VMs. ADMIN and MANAGER roles of a Sci tenancy will not be granted root access.
Note 2: ADMIN and MANAGER roles will not allow you to SSH into the Sci VM. It is necessary to have a USER role to do so.
Connect to the VM
From a JASMIN login server, login to the machine using the External IP address. In the same way, as you login to a JASMIN scientific server via login1. Your initial connection to JASMIN from your local machine needs to have your SSH key loaded in your SSH authentication agent, and you must have SSH Agent Forwarding enabled “-A”, see also how MISSING LINK.
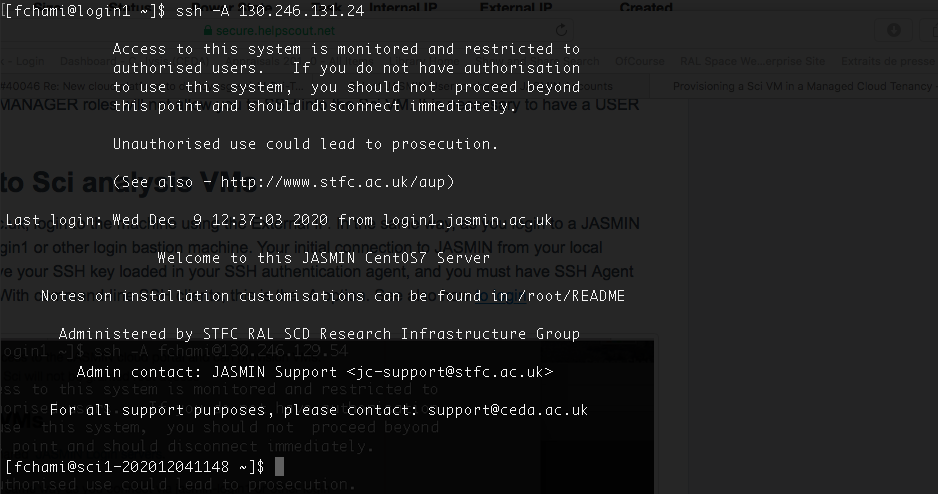
Note that although the new provisioned Sci VM has a local hostname (in
this example, sci1-202012041148.ncas-sci-m.jasmin.ac.uk ), this is NOT
registered in any Domain Name Service (DNS) by default, and we are not able to
arrange this for you, so you need to connect
to the machine using its External IP address, not the name.
Note : Users should report issues to the ADMIN and/or MANAGER of the
tenancy based SCI VM initially, rather than the JASMIN team. If the issue cannot be
resolved by the ADMIN and/or MANAGER, they should contact the JASMIN helpdesk.