Docs
Cluster-as-a-Service - Identity Manager
Cluster-as-a-Service - Identity Manager
This article describes how to deploy and use the JASMIN Cluster-as-a-Service (CaaS) Identity Manager.
Introduction
The Identity Manager consists of a
FreeIPA
server, a
Keycloak
server and a gateway/proxy server that
work together to provide a single identity across all cluster types, whether
via a web-browser, SSH or custom CLI tools like kubectl.
FreeIPA is an open-source identity management system specifically designed to manage Linux hosts and the user accounts on those hosts. To do this, It integrates LDAP , Kerberos , NTP , DNS and a certificate authority into a single unit that is easy to install and configure.
Keycloak is an open-source product that provides single sign-on (SSO) using OpenID Connect and SAML , primarily aimed at web-based services.
FreeIPA and Keycloak are powerful systems, and a full discussion of their capabilities is beyond the scope of this article. This article focuses on their use within the CaaS system, and will be sufficient for the vast majority of users. Any usage that deviates from that described in the JASMIN CaaS documentation is not explicitly supported, should something go wrong.
All hosts deployed using CaaS are registered with the FreeIPA instance for your tenancy, and FreeIPA provides DNS, user/group management and access control policies for those hosts. FreeIPA is also the single source of truth for users and groups on your clusters. It is not possible to link with other accounts, including JASMIN accounts. Keycloak is used to provide OpenID Connect support for web applications, and for Kubernetes authentication. Although Keycloak can manage its own users and groups, in the Identity Manager setup it consumes the users and groups from FreeIPA via the LDAP integration in order to provide a single user account across all clusters.
The web interfaces for FreeIPA and Keycloak are exposed through a single gateway/proxy host. This host is also configured to allow SSH access for all active users, which means it can be used with SSH agent forwarding as a jump host for SSH access to clusters without an external IP (similar to the way that the MISSING LINK work.)
The Identity Manager does not have self-service user registration or password reset - these operations must be performed by an admin on behalf of the user.
Cluster configuration
The following variables are available when creating an Identity Manager:
| Variable | Description | Required? | Can be updated? |
|---|---|---|---|
| External IP | The external IP that will be attached to the gateway host. This is the the IP that can be used as a jump host for SSH access. | Yes | No |
| Admin password | The password for the admin account. When the Identity Manager is created, this is the only user that exists. Please make sure you choose a secure password. WARNING: This password cannot be changed. Changing the admin password in the FreeIPA web interface will break cluster configuration for all clusters. |
Yes | No |
| Admin IP ranges | One or more IP ranges from which admins will access the FreeIPA and Keycloak web interfaces, in CIDR notation . Any attempt to access the admin interfaces froman IP address that is not in these ranges will be blocked. FreeIPA and Keycloak allow the creation and modification of users and permissions for all your clusters, so it is recommended that this range be as small as possible. If you are not sure what value to use here, contact your local network administrator to find out the appropriate value for your network. | Yes | Yes |
| FreeIPA size | The machine size to use for the FreeIPA server. | Yes | No |
| Keycloak size | The machine size to use for the Keycloak server. | Yes | No |
| Gateway size | The machine size to use for the gateway server. | Yes | No |
| Gateway domain | The domain to use for the gateway server. If left empty, <dashed-gateway-ip>.sslip.io is used (this uses the
sslip.io
service). For example, if the selected gateway IP is 192.171.139.83, the domain will be 192-171-139-83.sslip.io.If given, the domain must already be configured to point to the External IP , otherwise configuration will fail. Only use this option if you have control over your own DNS entries - the CaaS system will not create a DNS entry for you. |
No | No |
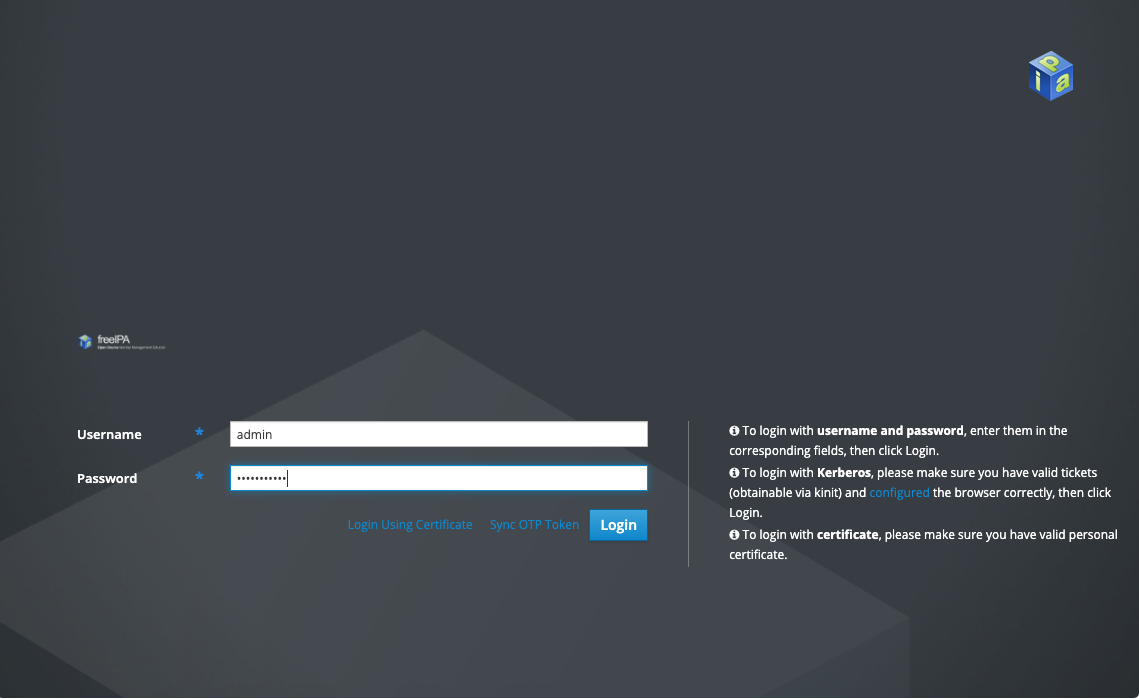
Once configuration is complete, the FreeIPA web interface will be available at
https://<gateway domain>. You should be able to authenticate with the
username admin and the password that was given at deployment time:
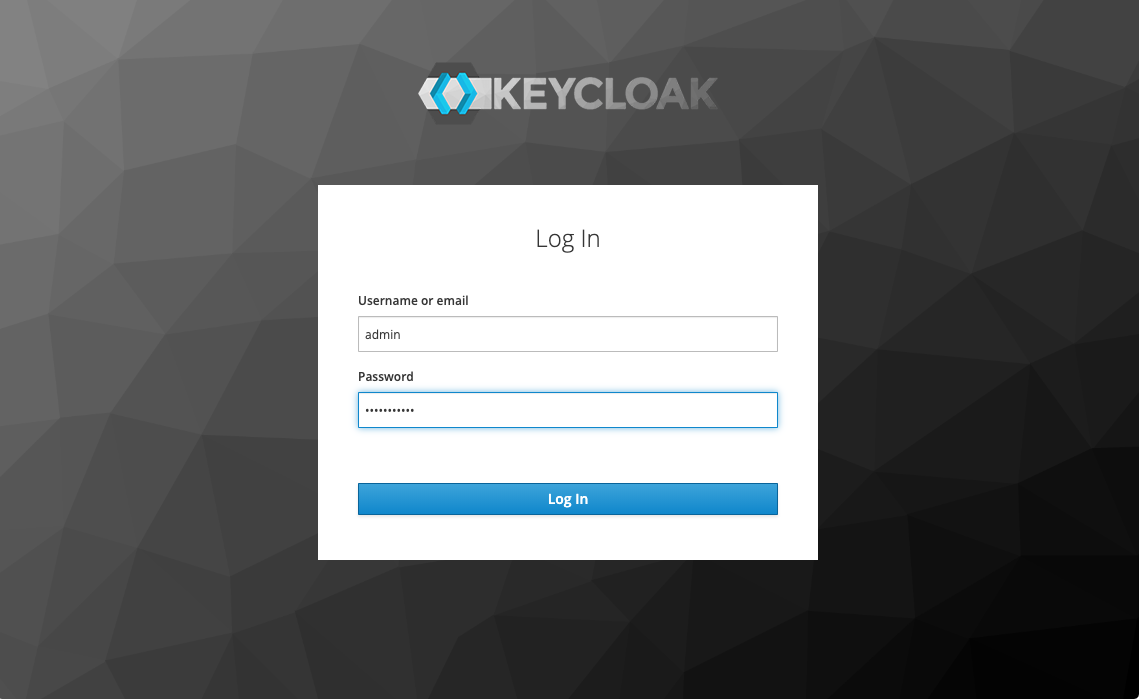
The Keycloak web interface is available at https://<gateway domain>/auth/.
You should be able to authenticate with the same username and password as
FreeIPA.
Managing users
The users of your clusters are not related in any way to JASMIN users - in fact, there is no requirement that the users of your clusters have a JASMIN account. The pattern we encourage is that one or more admins with JASMIN accounts and access to the JASMIN Cloud Portal deploy and maintain clusters on behalf of their users. Those admins can then create user accounts and grant access to clusters for their own users without those users even needing to be aware of JASMIN.
Creating a user
To add a new user, first log in to the FreeIPA interface. Do not add users via the Keycloak interface. You will be taken to the users panel, where you click the Add button:

This will pop up a dialogue for you to populate some basic information about the user. The User login , First name , Last name and New/Verify password fields are the ones that need to be populated. Pick a strong password for the user - they can change this later via the FreeIPA interface if they wish:
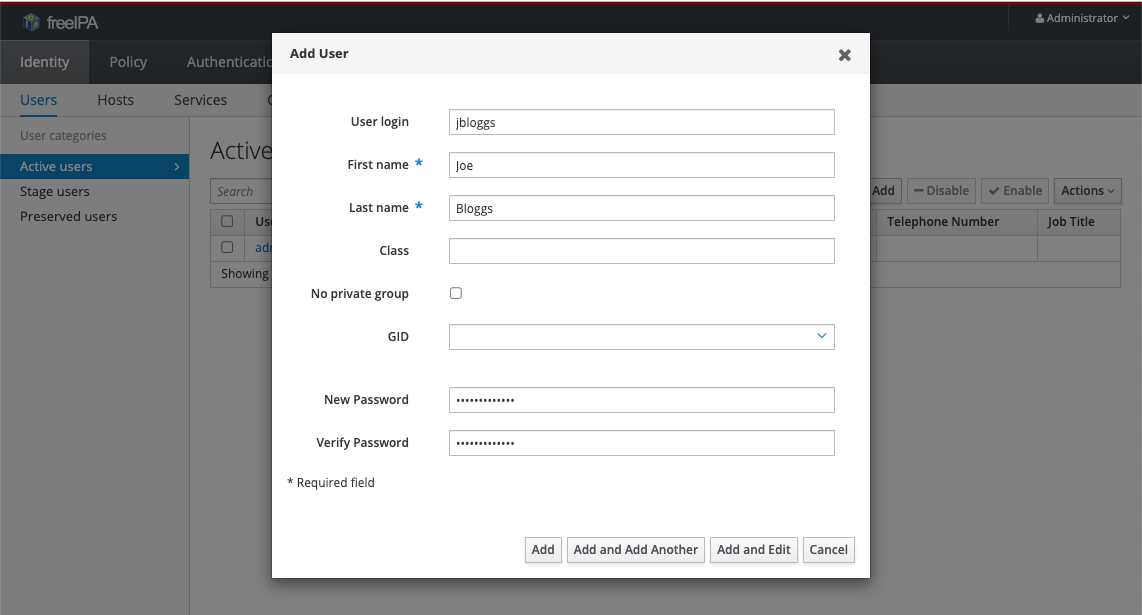
Click Add to create the user. You must then securely distribute this password to the user - if possible, write it down and give it to them in person, otherwise use an encrypted email.
The first time they log in, they will be asked to set a new password. Make sure they do this as soon as possible:
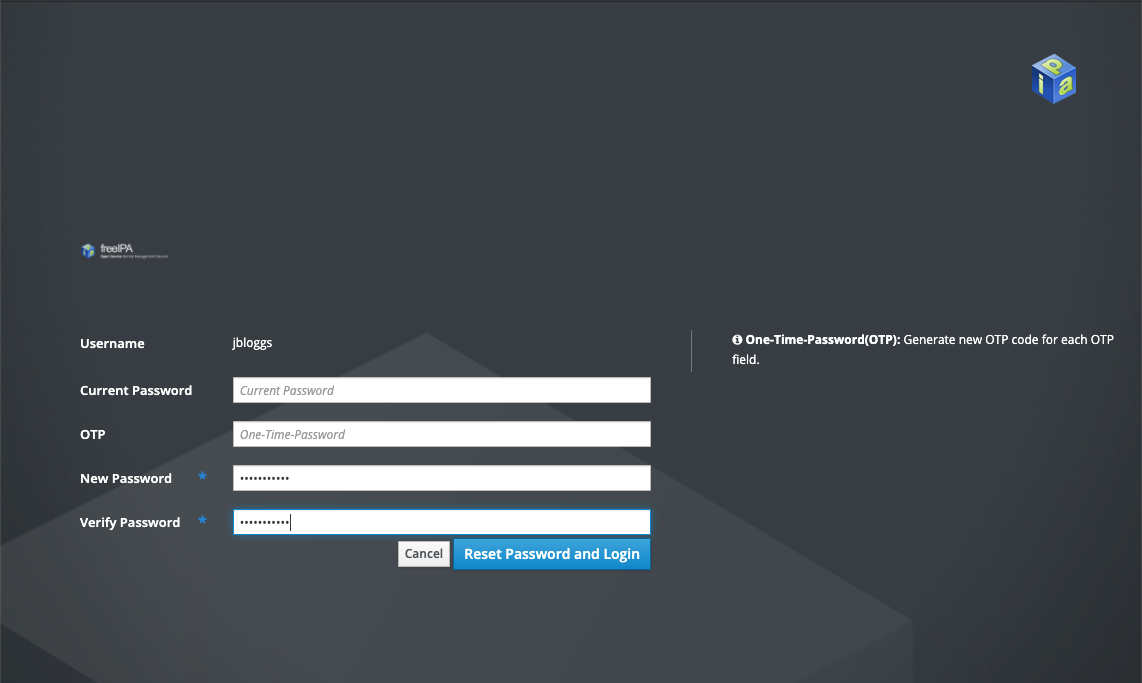
The newly added user cannot do anything except view the users and modify some of their own information. They can see, but not edit, their group memberships.
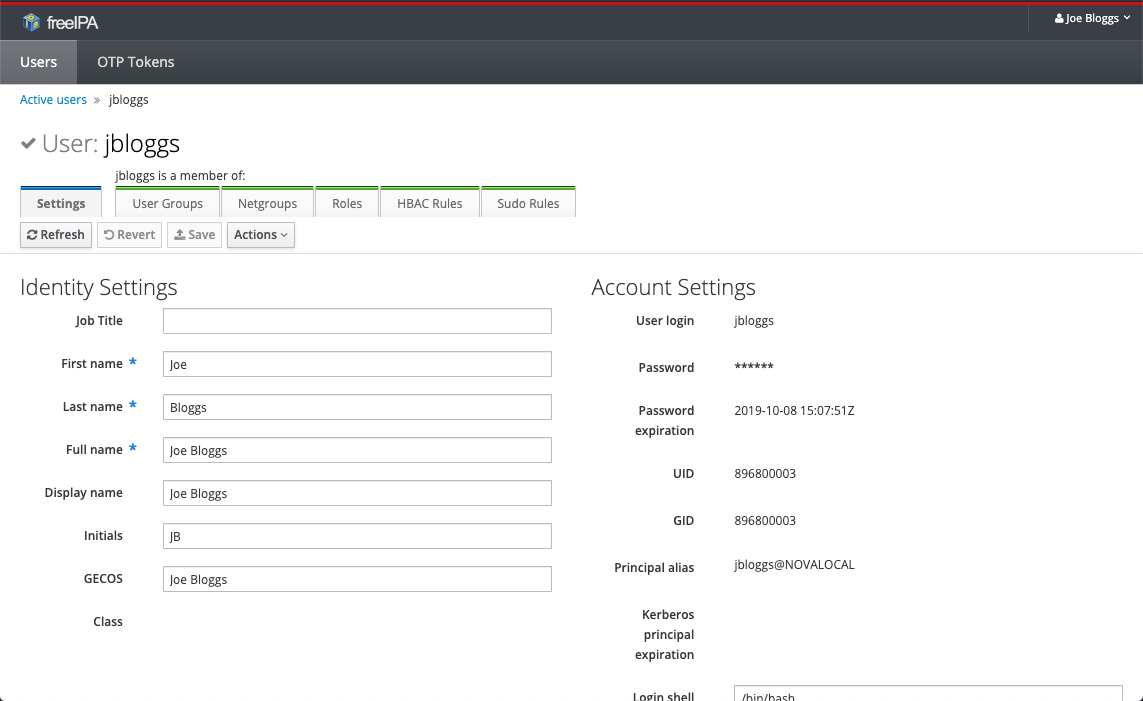
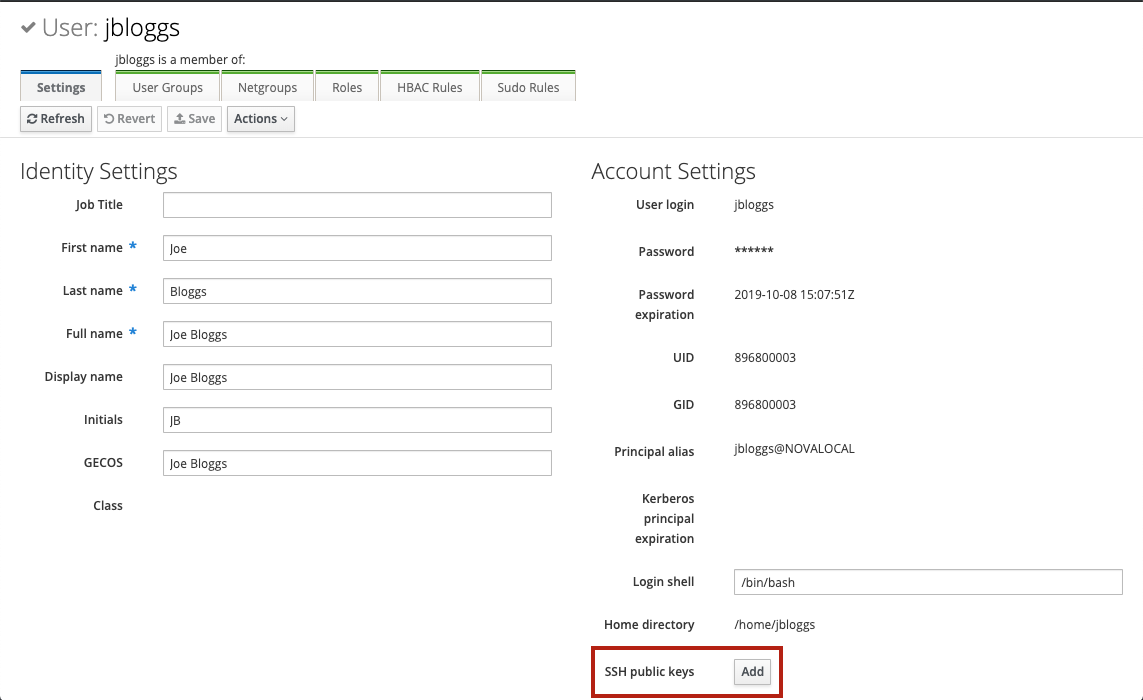
Adding an SSH public key
Adding an SSH public key can be done either by the user themselves or by an admin. First, navigate to the details page for the user. In the Account Settings section, there is an item called SSH public keys. Click the Add button next to it:
This will open a dialogue where the SSH public key can be entered:
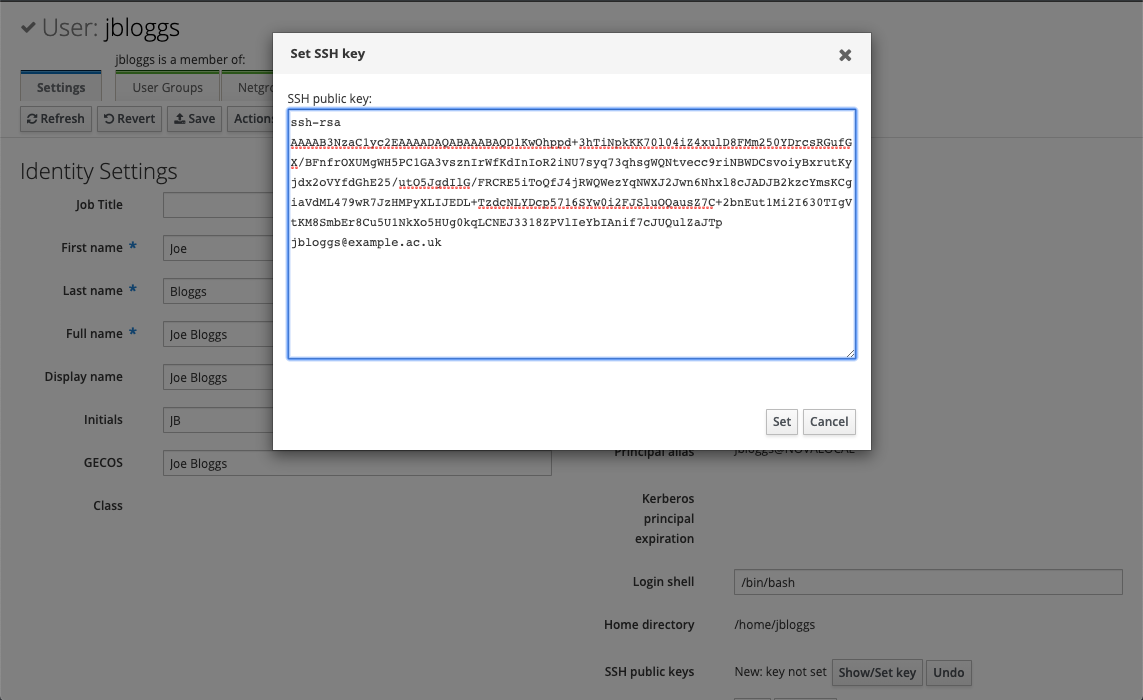
After clicking Set , the user interface will show New: key set under the SSH public keys item. However, the key is not preserved until the user is saved by clicking the Save button:
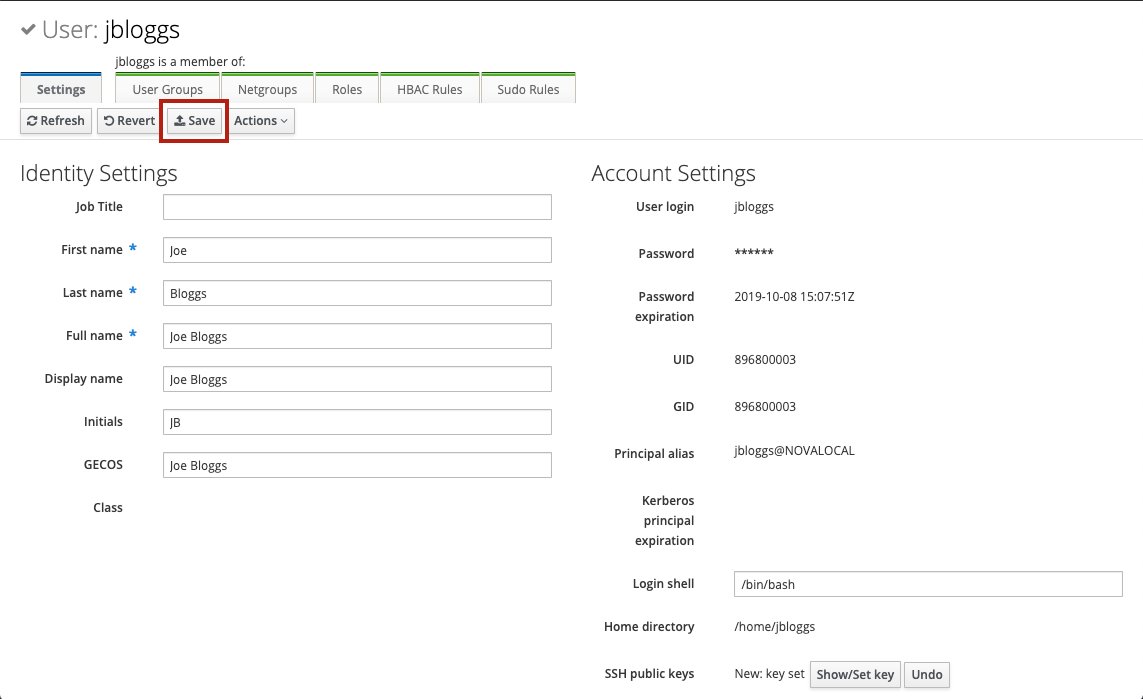
Once saved, the content of the SSH public keys item will change to a fingerprint, which means the key was saved correctly. The key can be updated or deleted at any point in the future if the associated private key is compromised or lost:

Changing a user’s password
FreeIPA has no facility for self-service password reset, however users can change their own password or an admin can reset it on their behalf. The procedure is the same in both cases, except that when changing their own password the user is required to provide their current password as well as the new one.
To change a user’s password, first navigate to the user details page then select Reset password from the Actions dropdown:
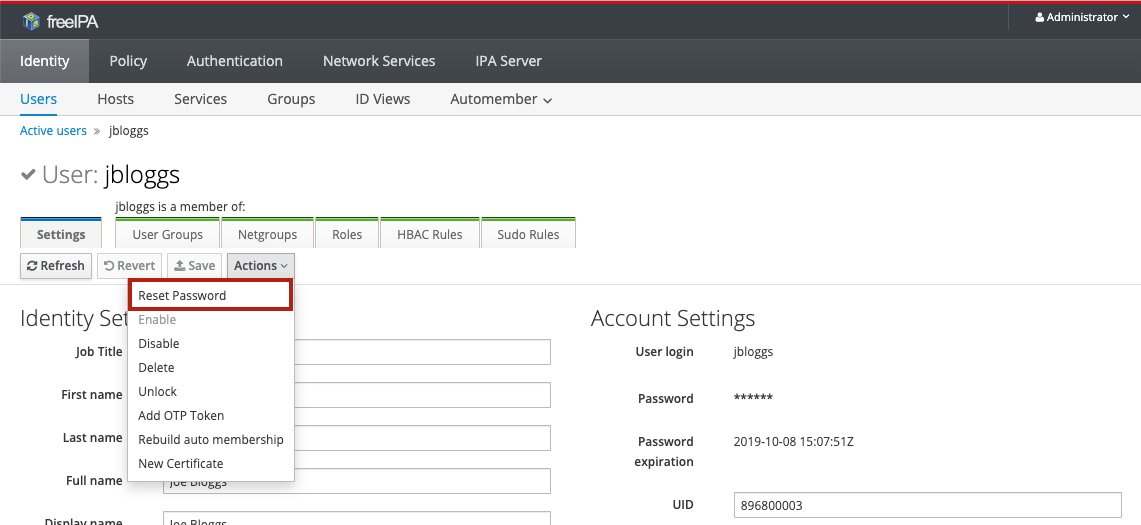
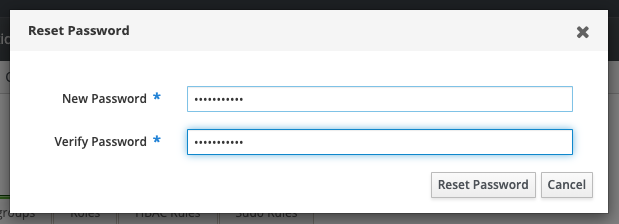
This will open a dialogue where a new password can be entered. An admin changing the password on behalf of another user will only see the New/Verify Password fields:
A user resetting their own password will also see Current Password and OTP fields. The current password must be provided. OTP can be ignored.
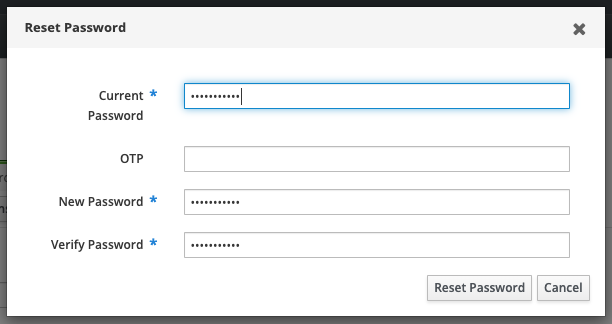
After clicking Reset Password , the password is changed.
If a user’s password is reset by an admin, the user will be asked to change their password the first time they log in, like when a new user is created.
Deleting a user
To delete a user, navigate to the Identity > Users > Active users page. On this page, check the box next the user you want to disable, then click the Delete button:

In the confirmation dialogue that pops up, make sure to select preserve as the Delete mode - it is not recommended to permanently delete users:
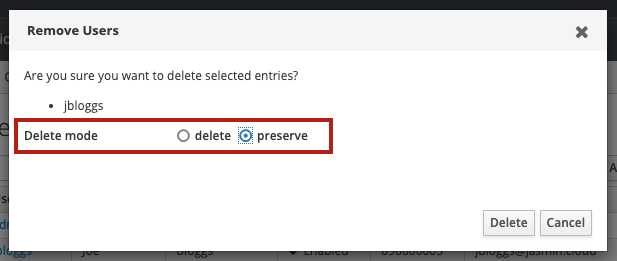
Upon clicking the Delete button, the user will be moved to the Preserved users section:

They will no longer show up as a user on any CaaS hosts or in Keycloak. They can be easily restored by selecting the user and clicking the Restore button.
Managing groups
When you deploy a cluster through CaaS, it may create one or more access control groups in FreeIPA as part of its configuration. Some clusters can also consume additional groups created in FreeIPA. This is discussed in more detail in the documentation for each cluster type, but the way you manage group membership is the same in all cases.
Creating a new group
To create a new group, navigate to the Identity > Groups > User groups section and click the Add button:
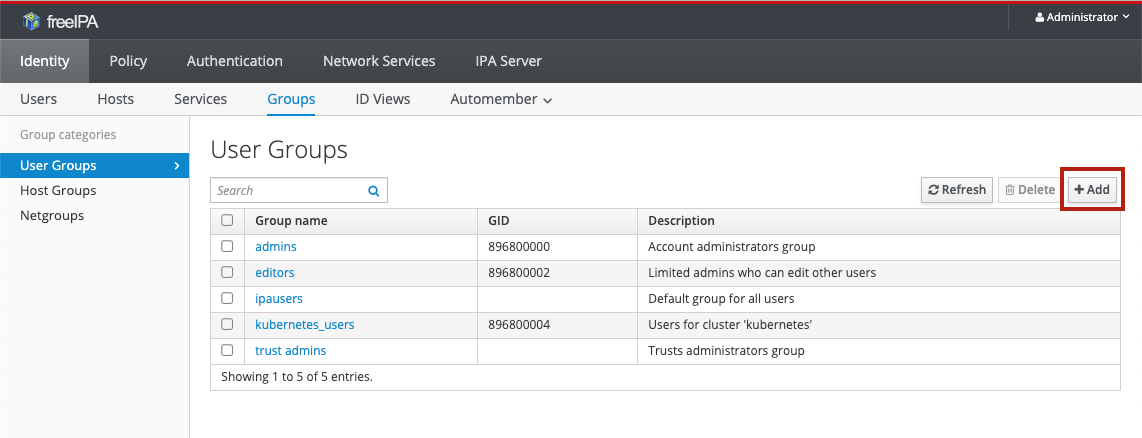
In the resulting dialogue, set the Group name and, if you wish, a Description (recommended!). The Group Type can be left as POSIX , even if the group is only to be used for OpenID Connect. By leaving GID empty, a free GID will be allocated:
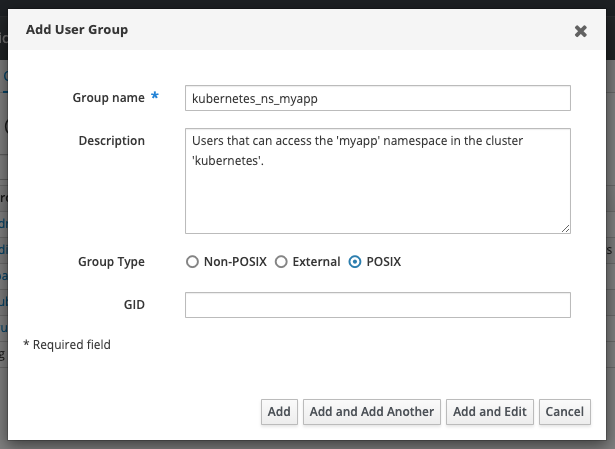
After clicking the Add button, the new group will be available for adding users.
Adding and removing users
First, navigate to the Identity > Groups > User groups section:
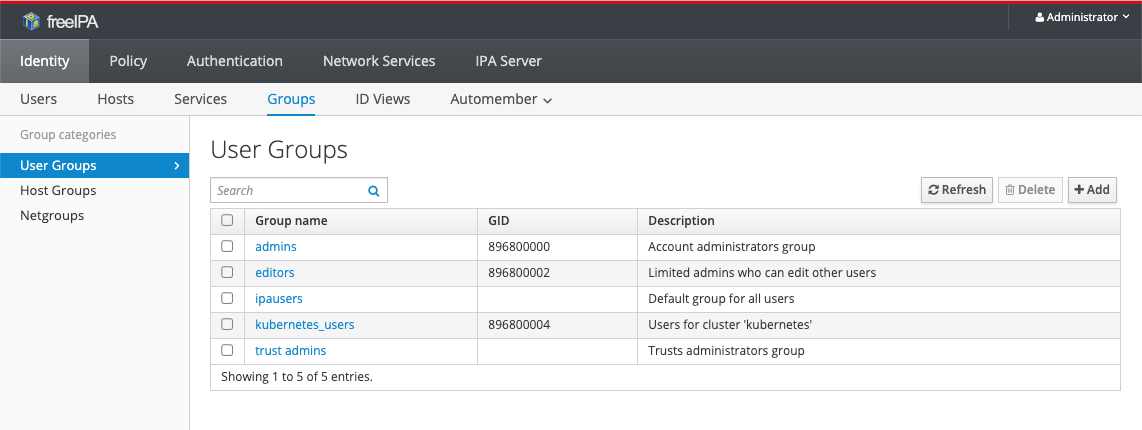
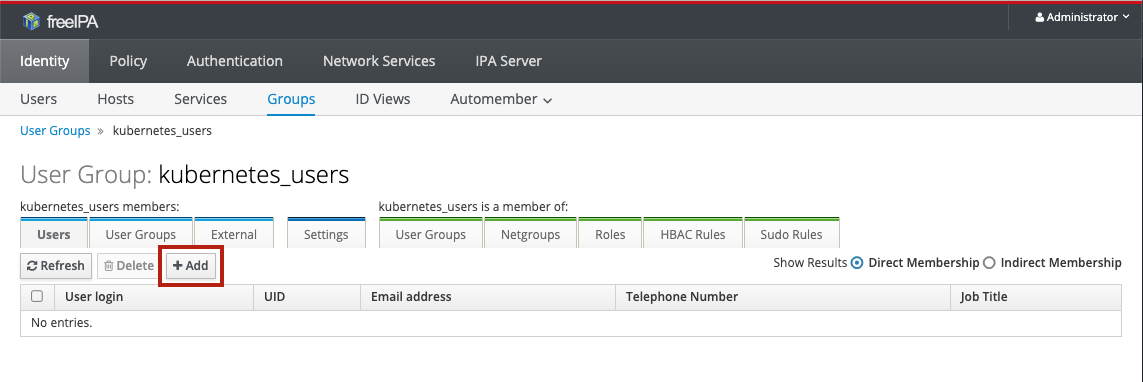
Click on the group that you want to add/remove users for to get to the details page for that group. To add users, click the Add button:
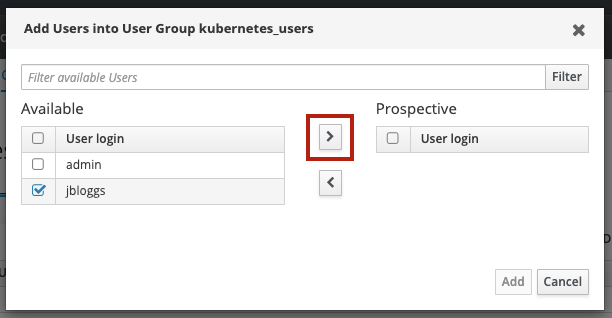
In the dialogue that pops up, select the users you want to add and click the > button to move them from Available to Prospective :
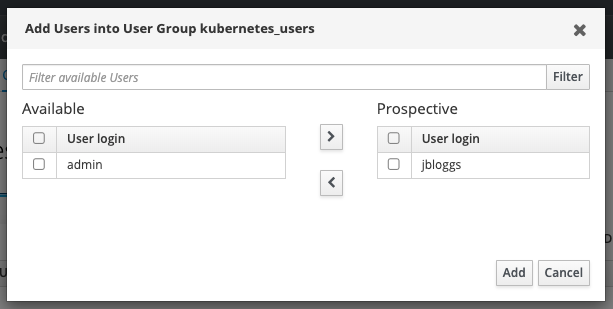
Click Add to add the users to the group.
To remove users from a group, select them in the user list for the group and click Delete :
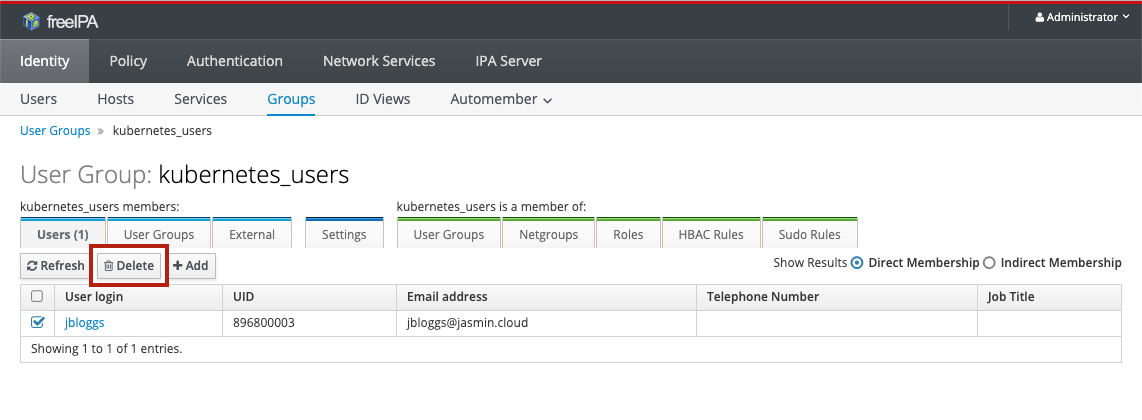
Upon confirmation, the users will be removed from the group.
The admins group
There is one special group that is created in FreeIPA by default, called
admins. This group is respected by all cluster types and members are granted
permissions across all clusters deployed using CaaS, including (but not
limited to):
- Full admin access to the FreeIPA and Keycloak web interfaces
- SSH access to all hosts deployed using CaaS
cluster-adminaccess to all Kubernetes clusters- Access to all Pangeo clusters
Managing OpenID Connect clients
For an application to use OpenID Connect to authenticate users, it must first be registered as a client with Keycloak. Clients are issued with an ID and secret so that Keycloak knows which application is making an authorisation request.
To manage your OpenID Connect clients, go to Keycloak at https://<gateway domain>/auth/ and click Administration Console. Upon signing in with
valid admin credentials (see The admins group above) you will be redirected to
the Keycloak admin console. Click on Clients in the menu to see the list
of clients:
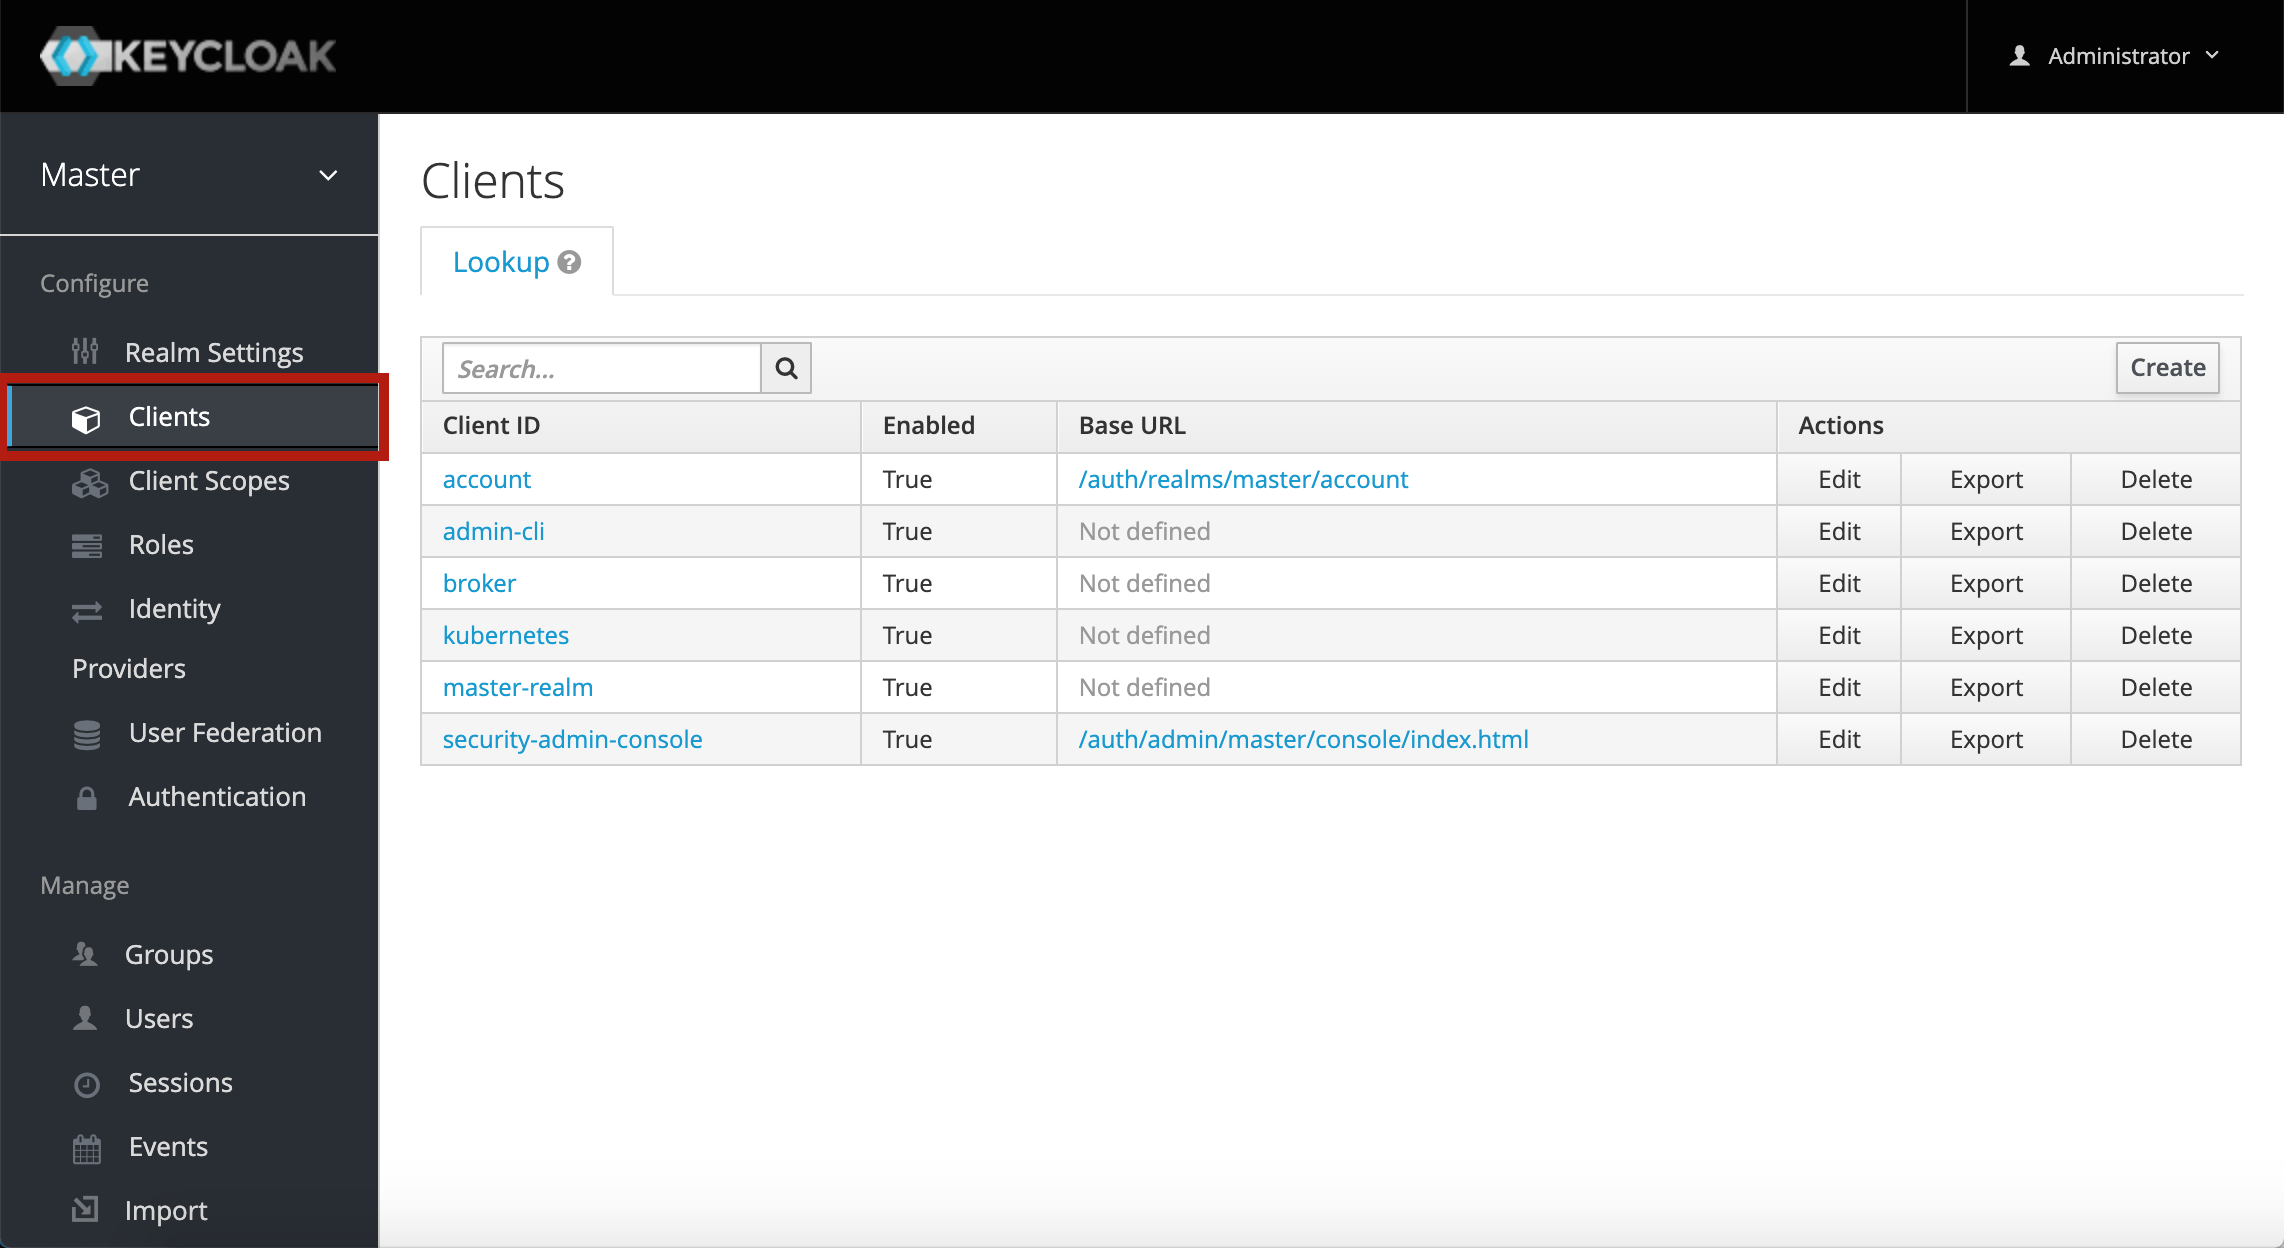
Keycloak itself uses OpenID Connect to handle authentication for its web and
command-line interfaces, so there are several clients related to Keycloak
operations. CaaS will also automatically create new OpenID Connect clients for
clusters that need them - most notably Kubernetes clusters - in which case the
client will be named after the cluster. The client with Client ID
kubernetes in the list above is an example of a client created by CaaS.
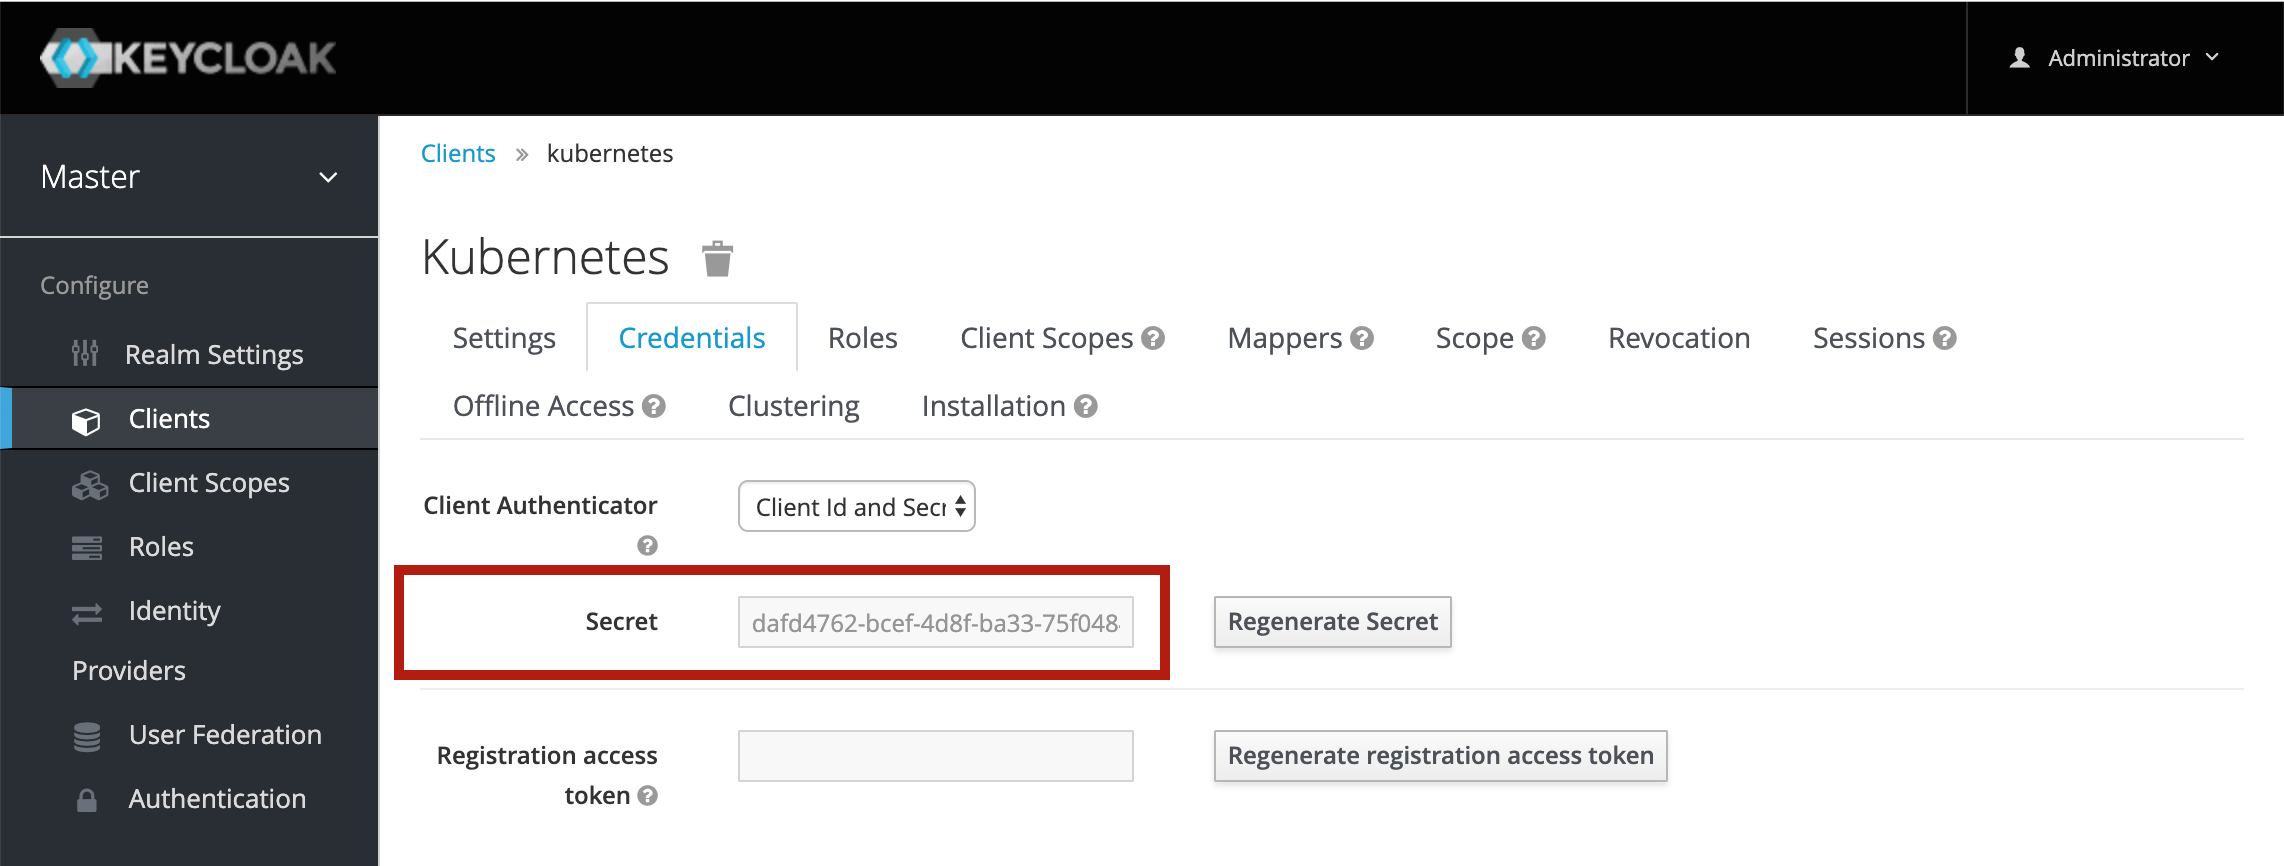
In order to configure an OpenID Connect client to talk to Keycloak, you also need the client secret. To find out the secret for a client, click on the client and then click on the Credentials tab:
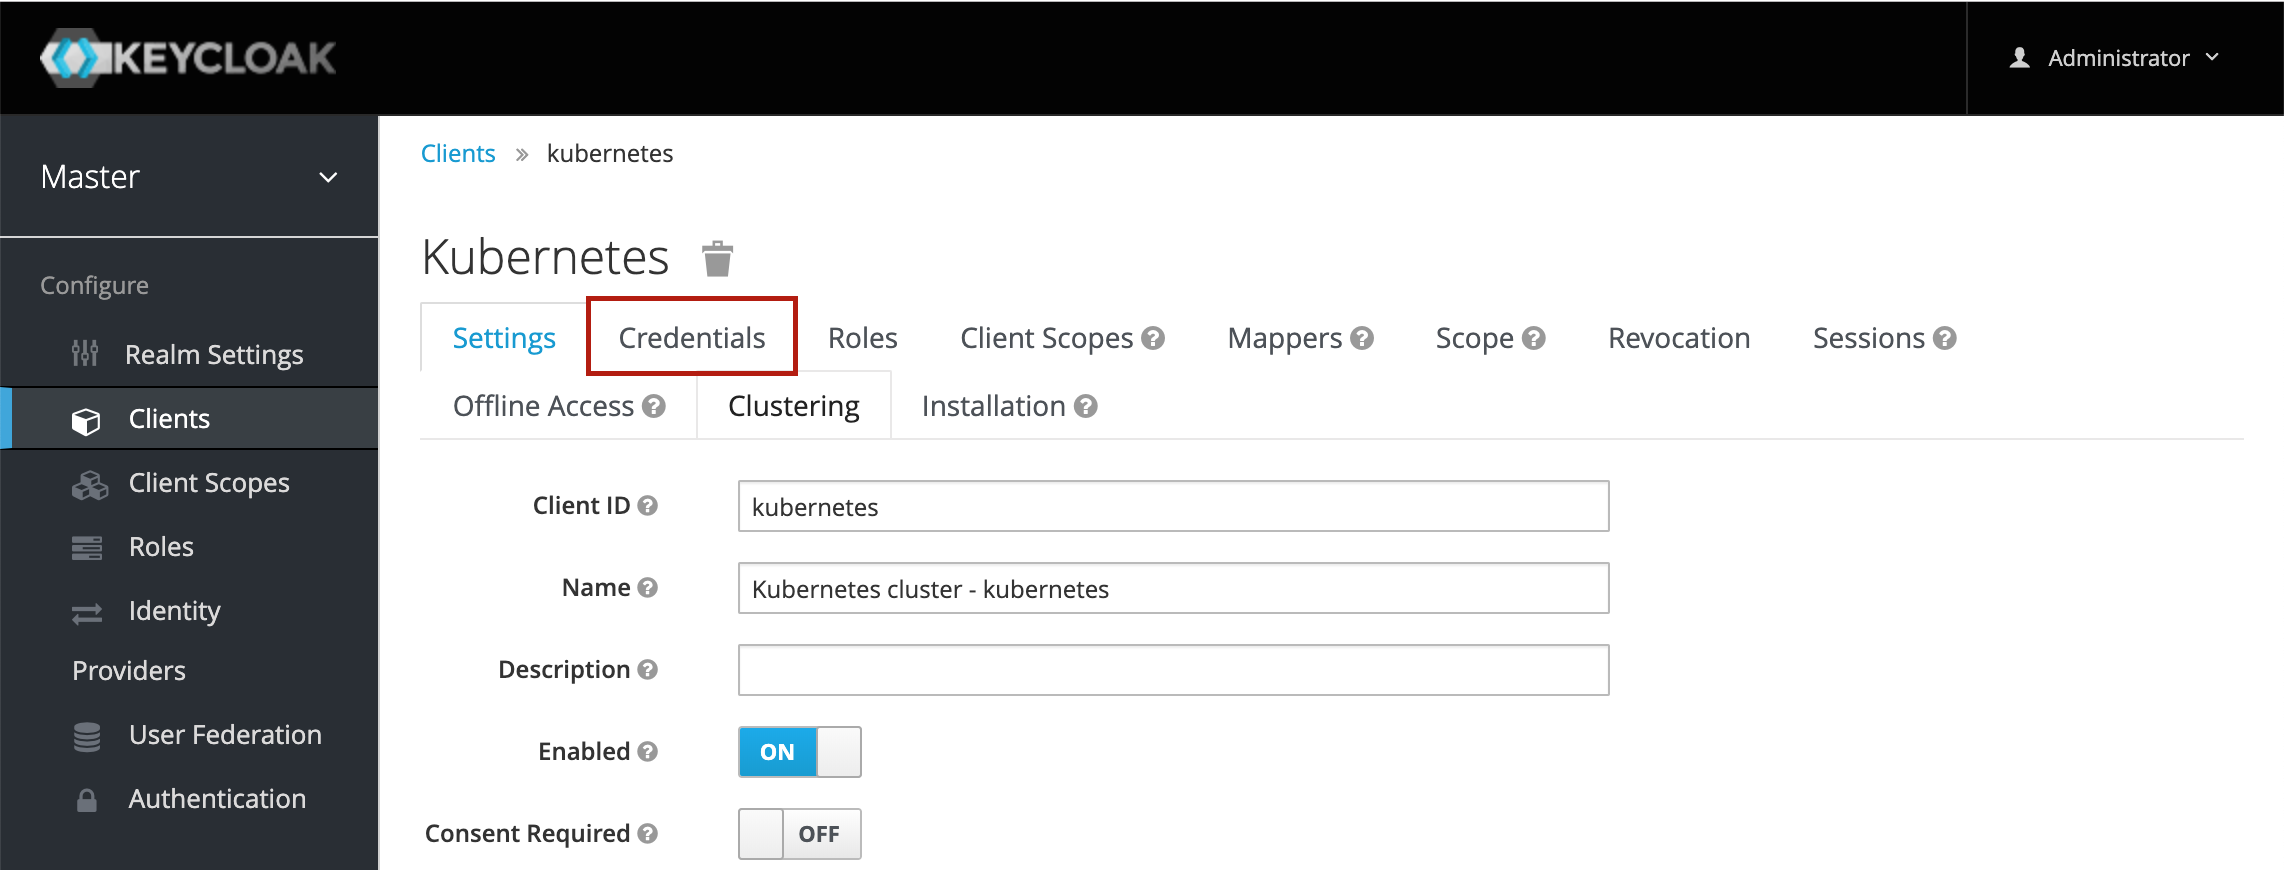
The client secret is then shown in a disabled text box, where it can be copied from:
